

Groupboss automates your workflow and saves you from copy-pasting answers from incoming Facebook group members. It also helps you to collect the answers in google sheet and emails in the email marketing autoresponders with a single click.
So, no more manual copy-pasting of data to google sheet.
There are many email marketing autoresponders that allow you to automate your mailing process. Groupboss has got direct integration with a few of them. You can now send the collected email address from your Facebook group to email marketing autoresponder with a single click.
Don’t forget to check the support page of Groupboss to know more about the simple steps of these integrations.
Now a question may arise ‘Isn’t it possible to collect the email addresses from the Facebook group to other email marketing autoresponders that do not have direct integration with Groupboss?”
If this question pops up in your mind then this short writing is for you.
The answer to the above question is positive. You can send emails to the autoresponders that are not integrated with Groupboss.
You can do that using Zapier. Groupboss has got direct integration with
Google sheet. Zapier has got integration with Google Sheets. You can send the emails to your favorite email marketing autoresponders using zapier with Google Sheets.
Here an example is shown with an email marketing autoresponder named Encharge.io.
The steps of the integration are described below.
1. Go to the google sheet integration page with zapier.
2. Now search for ‘Encharge’ and select it.
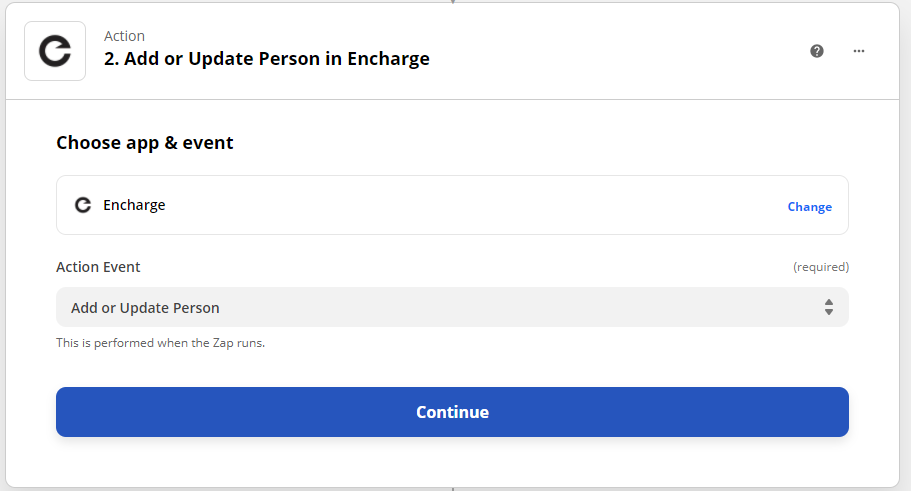
3. Now you need to select trigger and action. Select ‘New Spreadsheet Row’ as the trigger and ‘Add or Update Person’ as the action.
3. Now click on “Connect Google sheets+ Encharge”
4. Now you need to your google account. If you have added already then you need to select that. If not, add your Google account and allow Zapier.
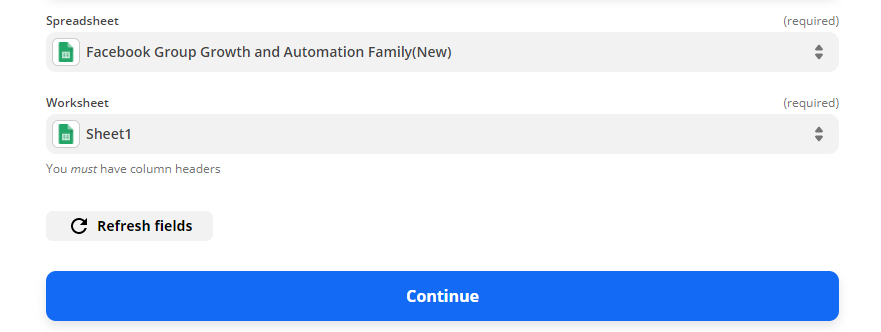
5. Now click ‘Continue’ to choose the spreadsheet and worksheet. Then tap on ‘Continue’. If you wish you can test the trigger.
6. Now click on ‘Continue’ and select your Encharge account.
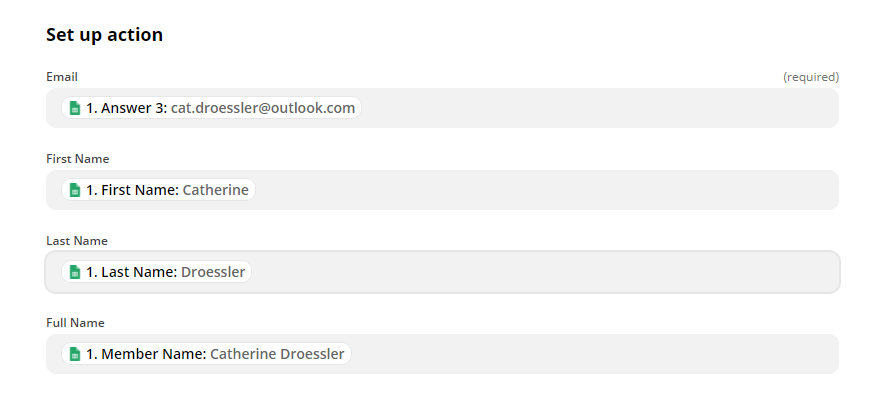
7. Now select the favorable setup actions and select the items from your spreadsheet.
8. You are almost done. Now you have the option to ‘test and review’ or ‘test and continue’. Let us select ‘test and continue’ and turn on the Zap.
9. You are now done with the setup. Now, go to your Facebook group and approve the members using “Approve by Groupboss” or “Approve All By Groupboss”.
10. Now go to the “People” section of your Encharge account and refresh the page. Don’t worry if you don’t see the email. Just wait for a few moments (Approximately 2 minutes) and refresh the page and you will find the email updated


